How to Check a Pokemon Card's Condition
In this guide
Checking a card's condition yourself is worth doing in two situations: before you buy a raw card (so the price you pay matches what the card actually is), and before you pay to have one graded (so you are not spending a submission fee on a card that comes back a 7). It will not tell you the grade — the grading company decides that — but a careful look gets you close.
Set up
- One light, diffuse. A window in daylight or a single lamp with a shade. Avoid direct overhead light and multiple sources — you want to be able to tilt the card and see how the light moves across the surface.
- A dark, clean surface. Whitening on edges and corners is far easier to see against black than against a table.
- Something to magnify with. A cheap jeweller's loupe (10x is plenty), or the macro / zoom mode on a phone camera. Most corner and edge issues are invisible at arm's length.
- Handle by the edges. Slide the card into a penny sleeve and hold that, so you are not adding fingerprints to the surface while you inspect it.
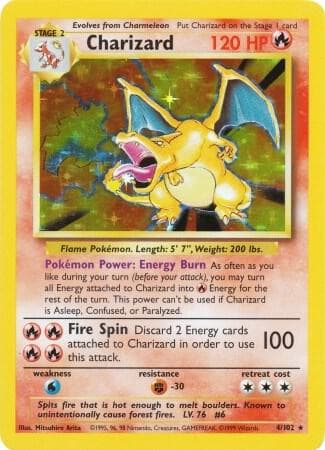 Base Set Charizard
A vintage holo: look at corners and centering first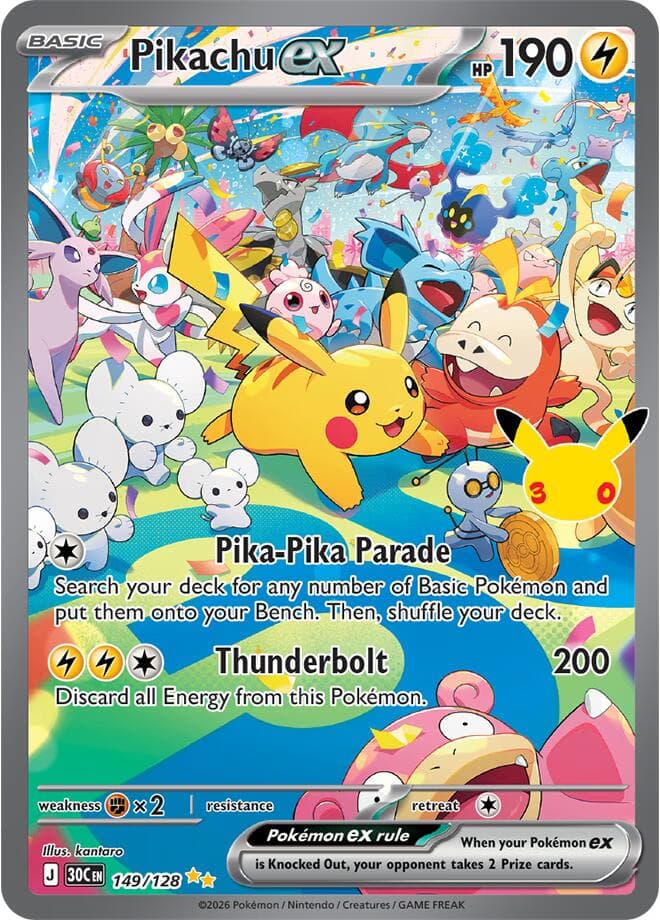 Pikachu ex #149/128
A modern special illustration rare: look at edges and surface first
The four things to check
These are the same areas a grader looks at. Go through them one at a time — it is easy to fixate on a nice holo and miss a soft corner.
| What to look at | How | What usually costs points |
|---|---|---|
| Centering | How even the border is on the front (and back). Measured as a ratio, e.g. 60/40 means one border is 1.5x the opposite one. | Borders that are visibly uneven left-to-right or top-to-bottom. Back centering also counts, usually less strictly. |
| Corners | All four corners under angled light and slight magnification. A sharp corner comes to a clean point. | Fraying, whitening, softness or a visible bend at the tip — even on one corner. |
| Edges | The full perimeter, front and back, for the pale line that appears where the top layer chips. | Whitening, nicks, roughness or a factory mis-cut along any edge. |
| Surface | The card face tilted against a light: print quality, holo pattern, scratches, indentations, print lines and any residue. | Scratches, scuffs, print dots or lines, dents, a light bend, cloudiness on holo, or a fingerprint that won't wipe. |
| Creases & bends | Flex the card gently (or view it edge-on against light) — a crease breaks the fibres and usually shows as a line. | Any crease is a hard ceiling on the grade, even a faint one visible only under light. A bend with no fibre break is less severe but still counts. |
A quick order to work in
- Centering. Look at the border on all four sides, front then back. If one side's border is clearly wider than the opposite side, note it — roughly, and as a ratio if you can (e.g. “60/40 left-right”).
- Corners. Each of the four, front and back, under the loupe and against the light. One frayed tip matters.
- Edges. Run your eye along the whole perimeter, front and back, for the pale chipped line and for any nick or rough patch.
- Surface. Tilt the card slowly under the light. Watch for scratches, scuffs, print lines or dots, indentations, and — on holo cards — cloudiness or scratching in the foil.
- Creases. Hold the card edge-on to the light, or flex it very gently. A crease shows as a line and is a hard ceiling on condition even when faint.
Turn it into a condition
Match what you found to the raw scale sellers and price guides use. Judge by the worst thing you saw, not the average.
- Near Mint — nothing you can see without the loupe; maybe one tiny thing with it.
- Lightly Played — light edge whitening, one soft corner, a small scratch.
- Moderately Played — obvious whitening or scratching, or a light crease; still sound.
- Heavily Played — heavy whitening, creasing, scuffing, or writing.
- Damaged — tears, big creases, bends, holes, water damage.
The gap between Near Mint and Lightly Played prices is usually large, so a listing called “NM” whose photos show edge wear is not the deal the price implies. This site reads the stated condition out of a listing and prices the card against that, not a blanket Near Mint assumption — see the methodology. To check a specific card's raw and graded values, search for it by name, set or card number in the price checker, or browse by Pokemon or the card database.
What to photograph
Whether you are listing the card or asking a seller for more detail, these are the shots that actually show condition:
- Full front and full back, straight on, filling the frame.
- Each corner close up.
- The surface at an angle so the light rakes across it and reveals scratches.
- Any specific flaw close up, with an edge or a fingertip in shot for scale.
If a listing does not show these, treat its stated condition as unverified rather than wrong — and price it as the photos support, not as the title claims.
The grader still decides
A thorough check tells you what is likely, not what will happen. Two graders can look at the same card and disagree, and a card can grade lower than a careful owner expected because of something — centering, a faint surface line — that is easy to under-weight on your own card. Use your inspection to decide whether grading is worth the fee, not to bank on a particular number. On when a grade pays for itself, see raw vs. graded.
Common questions
How do I check a Pokemon card's condition?
Under one bright, diffuse light on a dark surface, look at four things in turn — centering, corners, edges and surface — using magnification (a loupe or your phone's zoom). Then flex the card gently to check for creases. Judge the card by its worst area, and photograph each flaw.
Can I tell what grade a card will get before I send it?
You can form a realistic expectation, but not a guarantee. Grading companies use controlled lighting, measurement and magnification, weigh the four areas differently, and sometimes disagree with each other. Treat your own check as a floor, not a promise.
What do I need to check a card's condition?
A single bright, diffuse light source, a dark clean surface, and something to magnify with — a cheap jeweller's loupe, or the macro/zoom on a phone camera. A penny sleeve to hold the card by keeps fingerprints off the surface.
What is the difference between checking condition and getting a card graded?
Checking condition is what you do by hand to decide what a raw card is worth or whether to submit it. Grading is a paid third-party service that authenticates the card, assigns a 1–10 number, and seals it. Your check informs the decision; the grader makes the call.
Keep reading
- The Pokemon card grading scale, 1 to 10 — what each number means once a company has graded the card.
- Pokemon card condition & grading explained — the condition scale and the grading companies in one place.
- Raw vs. graded Pokemon cards — whether to send the card at all.